 |
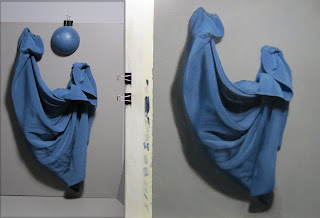
| Oil on Canvas Board and Set Up |
I am so fortunate to have had the opportunity to take another workshop with the amazing, talented, generous, patient...I could go on,
Graydon Parrish. This is the third time I have had the opportunity to take one of his workshops (see
Workshop 1 and
Workshop 2 for more info) and every time I am amazed at how much I learn yet how relaxed and fun the process is. When I learn on my own, it is more like a battle of wills and frustration and as I tend to learn by realizing what not to do....and then learning by the process.
The workshop was two weeks long during which time Graydon walked us through setting up the still life which he set up as a work of art in itself. He showed us how to determine the colors of the fabric and how the light affects the hue, value and chroma. He had us paint half a sphere and cube with the local color to better understand what we were seeing. We then mixed the color strings we needed by matching the munsell chips to what we observed on the fabric. Below is a photo of my palette with all of my paints mixed up.
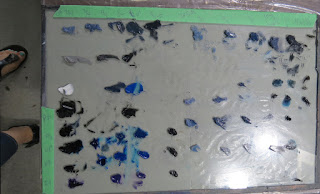 |
| Palette Before Painting Session |
I have all of my mixtures organized by hues first and then by value. So I have two hues strings one a purple blue that leans towards yellow and one a purple blue that leans towards purple, in munsell speak, 2.5PB2/4, 2.5PB3/4 and 2.5PB4/4 and 5PB2/4, 5PB3/4 and 5PB4/4. I also mixed up several darks to cover the range of darks observed in the fabric, a dark neutral, N1/ and a few more chromatic darks using the blues that I used to make the hue mixtures (ultramarine blue, winsor blue (yellow shade) and dioxazine purple) and a very dark chromatic black using peach black and a mix of ultramarine blue and winsor blue (yellow shade). For the background I used my pretubed colors of a neutral grays, very handy I must say.
While this sounds a little confusing and time consuming, it is actually quite simiple and quick once you get the hang of it and the best part is that all the work is done prior to starting the painting so once I paint, I only need to think about painting and do not have to shift between painting and mixing as much. I still mix while I paint, but the shifts are so slight that it feels more like part of the painting process than actual mixing. Below is a photo of my palette after the painting session.
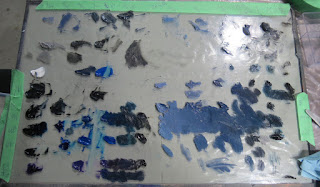 |
| Palette After Painting Session |
My palette used to be so messed up after a painting session as I frantically searched for the correct mixtures, often running out of that perfect mix near the end of the session. Then when I would come back to paint several days or weeks later, I would totally forget how I had achieved the mixtures and would waste more time trying to match up my new mixtures on my dry paint, not fun.
Now, using Munsell, I can easily match up the mixtures exactly and just carry on with fresh paint during the next session. If I am going to be painting the next day or within about a week, I can freeze my paints until the next session but they do get a little stiff. I am trying also putting a q-tip with clove oil in as well to see if that helps. Below is a photo of my palette after being in the freezer overnight.
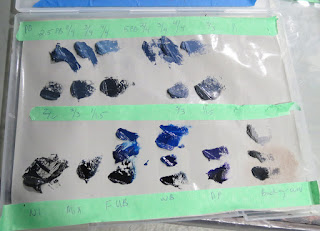 |
| Frozen Paint |
As you can see I have to label everything as my memory totally sucks the older I get! For more paint storage tips check out my
Paint Storage Tips
Graydon then walked us through the entire process from the drawing to the finish all the while teaching us to think and see the full effect rather than just the object that was in front of us. There were a couple of students working at the first and second level and Graydon had them working on other projects such as painting cubes like the ones below.
 |
| Tanya Bone Painting Cubes |
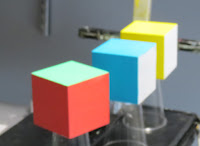 |
| Painted Cubes |
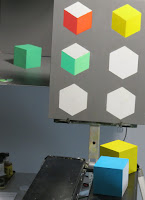 |
| Painting of Cubes |
I have learned so much and can't wait to apply everything over the next few months. I will also be teaching an oil painting class starting in September and while we will not be using Munsell per se, we will definitely be applying much of what I have learned.
If you would like to join me, please visit http://register.asapconnected.com/StaffDetails.aspx?pk=24306 for more information and to register.


Comments
Post a Comment